 Huge thanks to our friend Ashley Grenon for putting together this amazing DIY article about how to build your own custom TIE Fighter shelf!
Ashley has a number of other great articles just like this one with other projects at her site at AshleyGrenon.com where you can pay her a visit and see some of the other awesome stuff she’s working on.
Hi, I’m Ashley. I’m a fellow geek living in the city of Huntsville and I’m going to share how to build a Star Wars inspired TIE Fighter Shelf.

Tools and Supplies
The following items are some of the tools and supplies I gathered to build the TIE Fighter shelf.
Tools
- Drill/Driver
- Kreg Jig
- Circular saw
- Jigsaw
- Xacto knife
Supplies
- 1×12 – 24″
- 1×6 – 48″
- 1 1/4″ pocket hole screws
- Wood glue
- Gray spray paint + primer
- Black spray paint + primer
- Gloss sealer
- Painters tape
- Contact paper or removable vinyl paper
How to build a TIE Fighter Shelf
Step 1: Cut the boards to length
- Cut the 1×6 board into two 20″ long pieces
- Cut the 1×12 into two 11 1/4″ pieces.
Step 2: Cut out a hexagon shape for the TIE Fighter wings
- Orient the 1×12 squares such that the grain is running up and down.
- Mark the midpoint on the left and right side.
- Mark 2″ from each corner.
- Draw a line connecting the midpoint to the 2″ marks.
- Cut along the lines with a jigsaw or circular saw.
You should have a hexagon shape. Refer to the image below.
Step 3: Drill pocket holes
I like using pocket hole joints. They are quick and easy to make.
- Drill 2 pocket holes on the ends of each 1×6 board.
- Drill 3 pocket holes on the side of one 1×6 board.

Step 4: Sand
Prep the surface of the boards for painting. Sand, sand and sand. I used paint with primer. If you are not using a paint that contains primer take a moment and prime the surface.
Step 5: Apply the base coat of paint
- Paint one face of each 1×6 board with gray paint
- Paint 1×12 boards black on all sides
Allow the paint to dry completely before continuing on to the next step.
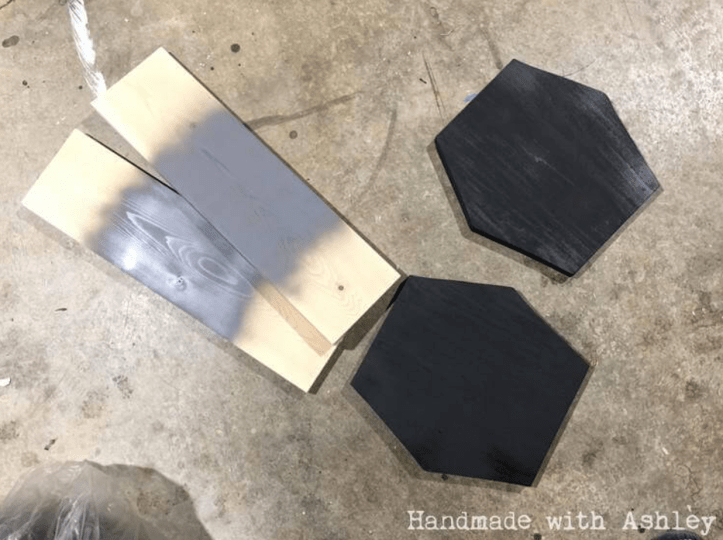
Applying a base coat of paint
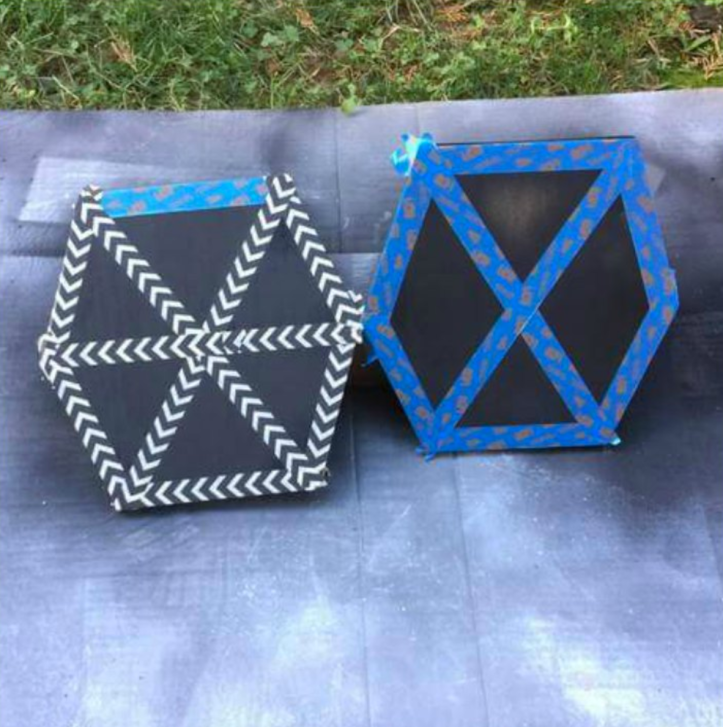
Step 6: Paint the TIE Fighter wings
- With 1″ painter’s tape, tape off each side of the hexagon
- Tape off the diagonals
- Apply a piece of tape from the left side to the right side
- Paint the exposed area with gray paint
Repeat this 3 more times for each face on the hexagons.
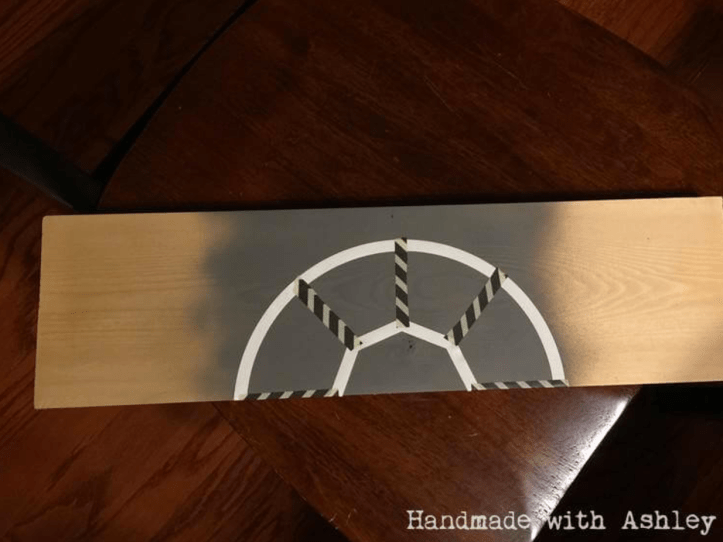
Step 7: Paint the TIE Fighter cockpit
Painting the TIE Fighter cockpit is the most difficult (and possibly most frustrating) step in the whole project. I used a mixture of contact paper and tape to create a stencil for spray painting the cockpit. You may find it easier to hand paint the cockpit.
Here are the dimensions for the cockpit:
- The circle has a radius of 4 1/2″
- Each side of the octagon is 2″
- The line thickness is 1/2″
I cut out a semicircle and half an octagon from contact paper. Once that was in place, I taped a line from each point on the octagon to the semicircle. Refer to the picture below for details.
I did not have 1/2″ painters tape so I just cut my existing tape in half.
Step 8: Assemble the shelf
To assemble the shelf:
- Join the 2 – 1×6 boards together
- Join the shelf to one wing
- Join the shelf to the other wing
I used a scrap 1×4 board to help attach the shelf to the wings:

Step 9: Seal the shelf
Seal the shelf with a few coats of your favorite sealer and you’re done. Enjoy!
